How to Print the Blending Cards in a Variety of Formats
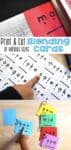
Blending Cards are a great tool to use with students who are learning to read. The Blending Cards are formatted whole-page, but you can print them in many different page configurations to meet the needs in your classroom.

Here are some ideas on how to print the blending cards in a variety of formats.
Why use different formats?
I used different formats when teaching different groups of students.
Do you do whole group teaching and small group teaching?
Do you like to send some students to work with a parent or classroom helper?
The ability to print these cards in a variety of formats will allow you to differentiate the format for many different learning opportunities.
A few notes about printing variations
PDF Reader
There are two PDF Readers that I use when printing products. They are Adobe Reader (PC & Mac) and Preview (Mac only). I have a Mac and use Preview more often than Adobe Reader. I have included screenshots from both programs.
The main difference when printing multiple pages on a page is that Preview has preset numbers whereas Adobe Reader asks you to select the rows and columns, just like a multiplication array.
Borders
The cards do not come with a border. My students who are easily distracted by too much print don’t do well with borders and extra stuff on the cards. I created the cards to be as distraction-free as possible.
In your PDF reader, you can select to print the blending cards with a border, if you would like to use one with your students. There are a variety of options in both Adobe Reader and Preview.
Folding the Cards
You could also easily fold the cards to make the swooping lines or dots disappear to differentiate the learning for your students. Cards can be folded and taped or just folded for each reading of the word.
This is also an awesome strategy for students who are easily distracted. You can make certain parts of the card disappear as students develop their skills.
-

-
-
VCE Words Blending Cards$6.75
-
-
Product on saleBlending Cards BUNDLEOriginal price was: $69.75.$36.00Current price is: $36.00.
-


Take a look at the blending cards and the different ways to print them.
[adthrive-in-post-video-player video-id=”ei4VyiqS” upload-date=”2023-03-06T14:32:00.000Z” name=”Blending Cards” description=”null” player-type=”default” override-embed=”default”]
Print the Blending Cards for Whole Group Instruction
The Blending Cards come to you in a whole-page format. That is the easiest print-and-go format. I use these cards for whole-group instruction when I introduce new decoding/blending patterns to students. I model a few words and we practice the process whole group.
The whole-group full-page cards are perfect to print, but they can also be easily projected onto a large screen or board. You can then have students come to the front of the room and model or practice blending using the projection.
Blending Cards for Small Group Reading Instruction
Printing the blending cards in a smaller format is great for small group instruction or to send home with students. Below are several different options for printing.

How to Print Four-to-a-Page

How to print the four-to-a-page format is described in the product on page three. I most often use this format for my small group instruction, although in writing this post I experimented with other formats that I have found more appealing as students become familiar with the process.
The four-to-a-page format creates cards that are large enough for little learners and are easy to cut into standard measurements. I generally don’t print the cards with a border. Since a piece of paper is 8.5 x 11 inches, I cut the cards 5.5 x 4.25 when printing four-to-a-page.
The cover of the blending cards products above features the quarter page cards with a hand of a five-year-old.
Here are some photos using Adobe Reader and printing four-to-a-page, which requires a 2×2 grid. This photo of how to print the blending cards is with a border.

This photo is without a border.

Here is a photo of how to adjust the settings in Preview on a Mac. Preview requires a few more clicks to get to the area to adjust the settings, and, like I mentioned above, has preset pages per sheet.

-
-
-
VCE Words Blending Cards$6.75
-
-
Product on saleBlending Cards BUNDLEOriginal price was: $69.75.$36.00Current price is: $36.00.
-
How to Print Six-to-a-page
I decided to experiment with a few more options for printing and cutting the blending cards. Although I really like the four-to-a-page option, I also like a few other formats, too.
Below are photos of the cards printed and cut at six-to-page. The colored cards that you see in this post are all printed six-to-page. The colored cards with a hand are my seven-year-old’s hand, so even for older first graders, the cards are a perfect size.


Above, you will see how I cut the cards. I don’t use borders on the cards. I prefer a nice clean look. I do assume that the printer prints fairly straight on the paper and uses the edge of the paper as my cutting guide. The printers aren’t perfectly straight, but it’s close enough.
One cut is done at 4.25 inches down the center of the page. The other cut, since there are three rows of cards, should be close to 3.66 inches. I’m not too exact and found that 3 11/16 was sufficient, using the ruler on my cutter.

Here is an example of the cards printed six-to-a page with a double border. If you print using a border, you can use the line as a cutting guide.

Here is an example of the printer settings for how to print blending cards six-to-a-page in Preview on a Mac with no border.

Other Formats
With some simple adjustments to your printer settings, you can print in a variety of configurations.
Eight-to-a-page
Here is an example of eight-to-a-page using Adobe Reader with a border.

Here is nine-to-a-page

These are the printer settings for Preview on a Mac.

Sixteen to a page
You may think that sixteen-to-a-page is too small for your students. I did too, but decided to try it anyway. I was pleasantly surprised at how they came out.

Just to give you an idea, this is my five-year-old’s hand over the full page. His finger clearly covers the dot, but the cards would not be too small to use with students, especially your higher students who generally need these more for review than in-depth practice.

Just to be clear, I would never give a student a page of 16 blending cards like what you see above. This was printed and photographed so you could see the size comparison. I only give students one card at a time.
Here are the printer settings for how to print the blending cards sixteen-to-a-page with a border in Preview on a Mac.

Eighteen-to-a-Page
This is Adobe Reader with a 3×6 grid, which is 18 to a page. These may be too small to use with students but I wanted to give you an idea of one more way to adjust the printer settings.

Compare the sizes
Here are some the cards together in one photograph. The size difference between the six-to-page and nine-to-a-page isn’t that much. If you’re short on paper or supplies, consider adjusting your printer settings to make cutting and assembly easier.

After printing the blending cards, put them on rings
My favorite way to store the blending cards is on rings. Simply hole punch and place each set on a ring. Students can easily flip to the next card to practice their reading. I also like to color code my cards so that I can easily find them during small group instruction.

Comment below: What is your favorite way to print the blending cards and use them with your students?
How to purchase the Blending Cards

The Blending Cards are available as a complete BUNDLE and as individual sets. Click here to purchase them on my web site. They are also available on Teachers Pay Teachers.
Purchase them all in a bundle to save money and have them readily available for you. Purchasing the bundle saves you 20% off purchasing each set individually.
- Short Vowel CVC Words
- Nonsense CVC Words
- Digraphs for Short Vowels
- Decodable Sight Words
- R Blends for Short Vowels
- S Blends & Clusters for Short Vowels
- L Blends & Clusters & tw, the, qu
- Final Blends & Clusters
- VCE Words
- Long & Other Vowel Digraphs
- R-Controlled Vowel Teams
-
-
-
VCE Words Blending Cards$6.75
-
-
-
-
-
-
-
-
-
Product on saleBlending Cards BUNDLEOriginal price was: $69.75.$36.00Current price is: $36.00.
-


We have also created Phonics Worksheets that utilize these blending cues. Check out the Short A Phonics Worksheets and the Short I Worksheets. These worksheets have 18 different templates with over 140 usable pages per vowel.

Thanks for all the great ideas.
This is Cumbersome. It is confusing to look through and click on the parts. I am not sure what the click and print first to put them in order of which to do first with my child. Would you tell me what order to go in for this program. It seems good, I am just not skilled in this area.
The Blending Cards aren’t a program, but a resource to be used use with any phonics-based program. Generally, students learn to read short vowel cvc words first starting with short a, then move onto digraphs or blends, and then vce words. I assess my students and figure out what they need to learn and use the cards that help them get to the next level in reading. These two blog posts will provide some background knowledge about teaching phonics: https://whatihavelearnedteaching.com/tips-student-success-blending-segmenting/ and https://whatihavelearnedteaching.com/stop-sounds-vs-continuous-sounds-need-know-difference/
These are amazing Jessica! They pair perfectly with the reading program I am currently using for my 3.5 year old. He has an articulation speech delay and these have provided a beautiful visual and activity aid for him. He has progressed leaps and bounds with his speech and articulation ability. He specifically struggles with being influence by the assimilation sounds within a word so these have really helped him single out the different sounds that make up a word. He loves the cards and gets excited for our reading lessons. Thank you for creating and sharing such an amazing tool. I found your directions easy to follow and love the variety of formats I can utilize.
You’re so welcome! I’m glad they are useful for you and your son and that the printing went smoothly for you.
Thank you this is just what I need,I will use them for my great grandson that’s going in to kindergarten.